| Home | Products | History | Buy | Contact |
You will require 1 MTE P7 torch or similar, and a dremmel, small file, or milling machine and a scalpel or similar
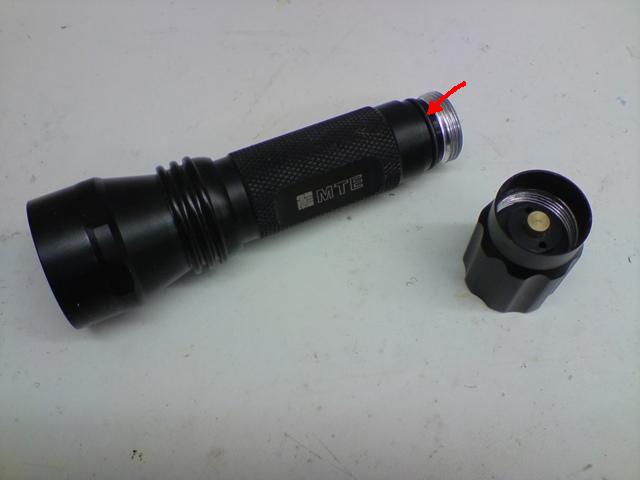
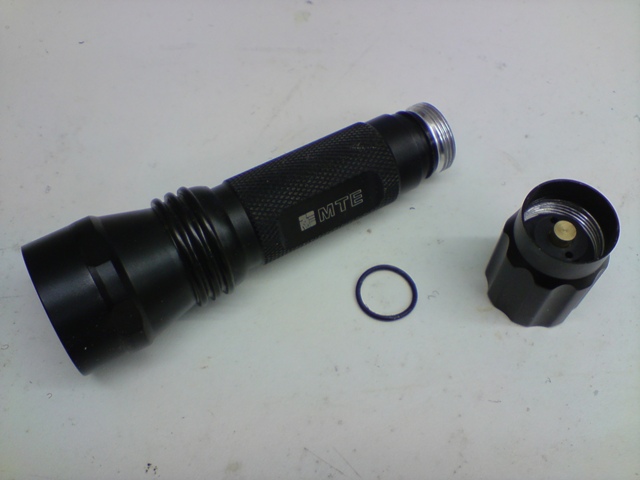
Unscrew the end cap, and remove the o-ring shown
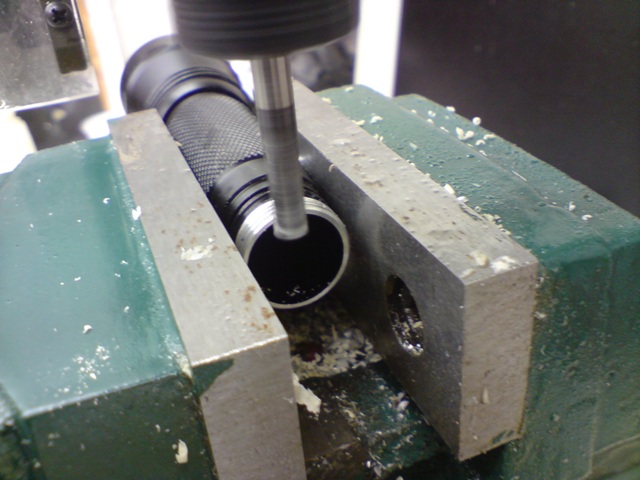
If you have a milling machine, mount the torch in a vice using spacers on the flats
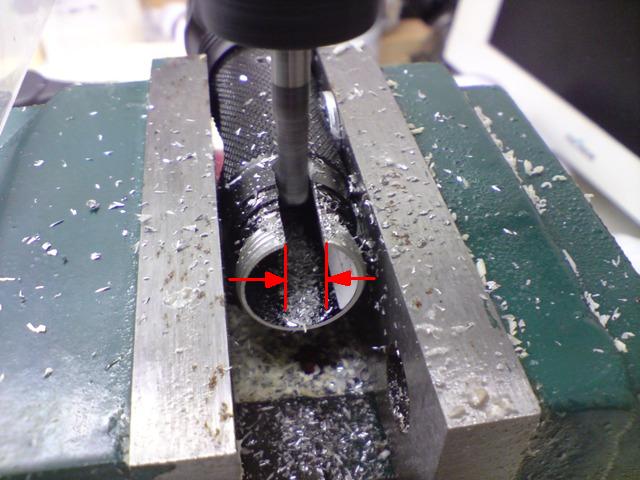
The width of the the slot depends on the kit you are assembling - the premium kit with the plugged cable uses a larger grommet requiring a 6.5mm wide slot. The budget kit uses a smaller grommet requiring a 5mm slot.
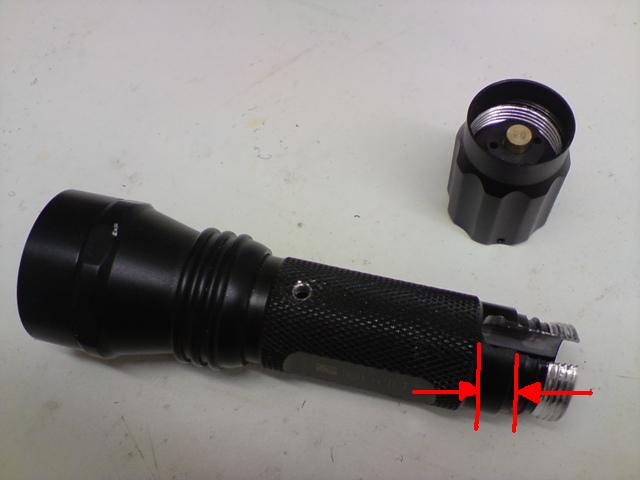
The slot needs to be deeper than the step on the torch body by the same amount as the width - ie 6.5/5mm
make sure you clean out any filings or swarf from the torch, and that the threads are OK
Wire your battery holder as per instructions here
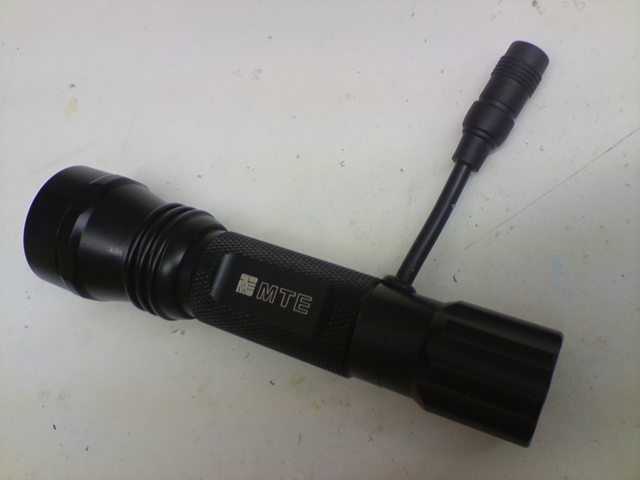
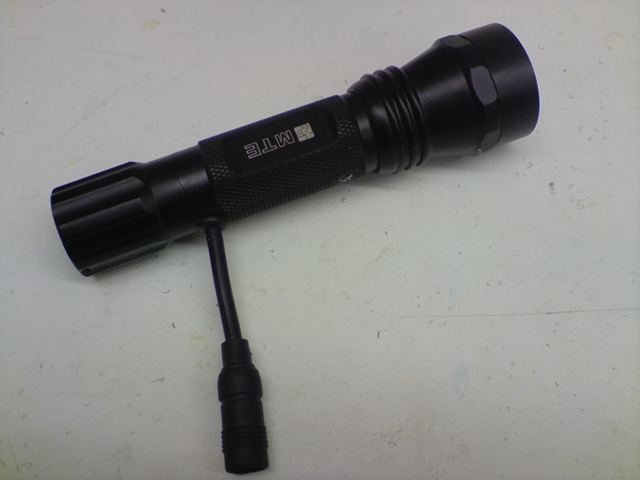
Cut your cable, I recommend aproximately 7cm from the female end.
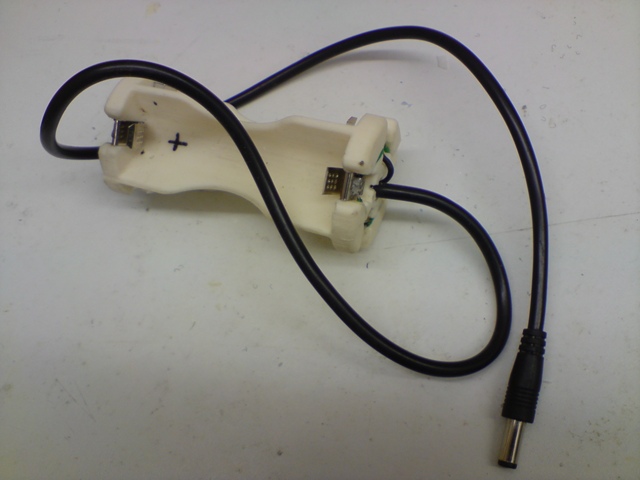
With the male part of the cable, remove the outer insulation roughly 6cm from the cut end, and solder the internal wires to your terminals at each end of the holder, with the cable exiting from the centre of the holder
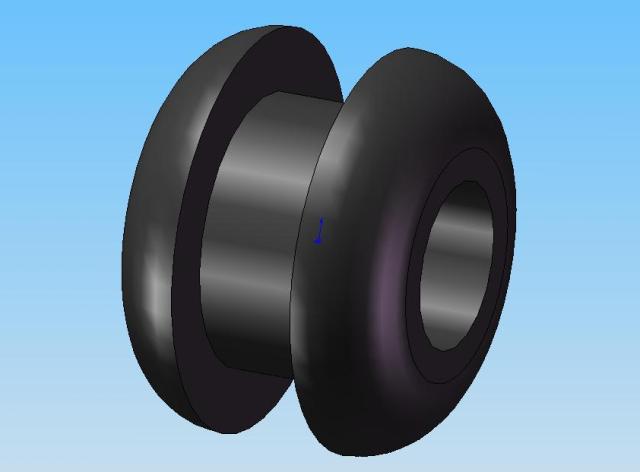
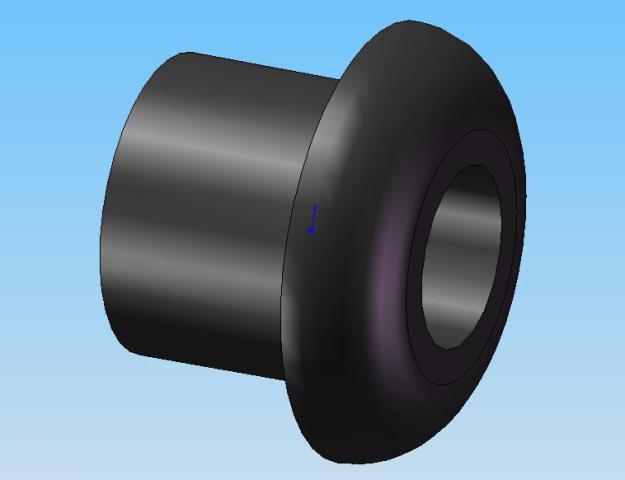
Before soldering the dummy cell, you need to modify the grommet, due to the thickness of the aluminium of the torch body.
Unless you are going to do some fancy filing to the inside of the battery tube of the torch, the standard grommet won't fit, so you need to cut off the protruding ring from one side of the grommet, so that you have what looks like the image on the right (my camera issn't very good at macro stuff, hence the solid models) this is fiddly, so a couple of spare grommets are in each kit to practice on - the sharper the blade the easier it is

Slide the modified grommet onto the remaining female ended cable, strip about 3cm of outer insulation, and solder to the copper rivets inside the dummy cell. You may wish to add some extra strength to the cell to avoid fatigue failure by packing out the internal void with something like bathroom sealer, or potting compound.
Insert your dummy cell into the torch, replace the o-ring you removed earlier, slide the grommet down so that it fits snugly into the hole, and you're done!